

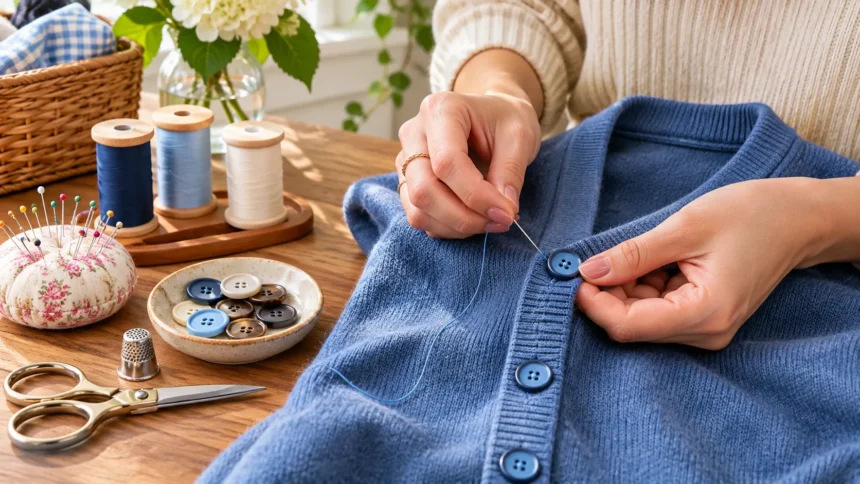
A missing or loose button can make your favorite shirt, jacket, or pair of trousers difficult to wear. Fortunately, learning how to replace a button is a simple clothing repair skill that requires only a few basic sewing supplies. With the right technique, you can restore your garments without visiting a tailor or spending money on unnecessary replacements.
Whether you need to replace a shirt button, repair a coat fastening, or attach a button to jeans, the process becomes easier with practice. This guide explains essential tools, beginner-friendly sewing techniques, and practical examples to help you complete neat, secure repairs. You will also learn how to choose replacement buttons and prevent them from coming loose again.
Why Learning How to Replace a Button Is Useful
Buttons are small clothing accessories, but they play an important role in keeping garments functional and comfortable. They secure shirts, coats, trousers, cardigans, and other wardrobe essentials during everyday activities. When a button falls off, even an otherwise well-maintained garment can become inconvenient to wear until the fastening is repaired.
Learning basic button sewing gives you a practical way to handle these problems independently. Instead of replacing clothing because of a missing button, you can often complete the repair using materials already available at home. This simple skill supports affordable wardrobe maintenance and helps extend the useful life of your favorite garments.
Button replacement also creates opportunities to improve the appearance of older clothing. You can replace damaged buttons with matching alternatives or update an entire set for a different style. Whether your goal is a discreet repair or a decorative change, understanding basic hand sewing techniques makes clothing maintenance more convenient.
Essential Tools You Need to Replace a Button
Replacing a button does not require expensive equipment or professional sewing experience. Most repairs can be completed with a hand-sewing needle, matching thread, small scissors, and a replacement button. These supplies are easy to store in a compact sewing kit, making it convenient to handle unexpected clothing repairs.
Choose a needle that suits the thickness and construction of your garment. Lightweight shirts generally require smaller needles, while thick coats and denim may need stronger options. Polyester all-purpose thread works well for many clothing repairs, although delicate fabrics may benefit from finer thread that blends naturally into the material.
A few additional tools can improve accuracy and make the repair process easier. A seam ripper helps remove damaged stitching, tailor’s chalk marks button positions, and a thimble protects your finger when sewing thick fabrics. You may also find a needle threader useful, particularly when working with small needles or fine thread.
How to Choose the Right Replacement Button
Choosing a suitable replacement button is important for both functionality and appearance. The new button should fit comfortably through the existing buttonhole without slipping out during normal movement. Its size, thickness, shape, and material should also suit the garment’s design and the amount of pressure placed on the fastening.
If possible, use a spare button supplied with the original garment. Many shirts, jackets, and trousers include extra buttons attached to care labels or stored in small packaging. When an identical replacement is unavailable, compare similar buttons carefully and prioritize the correct diameter, thickness, and fastening style.
For decorative clothing, you may choose a contrasting button that complements the overall design. However, replacing one button with a noticeably different style can affect the garment’s appearance if the remaining buttons match each other. In such cases, replacing the entire visible set may create a more consistent and polished result.
Understanding Different Types of Clothing Buttons
Clothing buttons come in several designs, and each type may require a slightly different attachment method. Flat buttons are among the most common options and usually feature two or four holes through which thread passes. They are frequently used on shirts, lightweight jackets, cardigans, and casual clothing because they are simple to attach.
Shank buttons have a small loop or raised attachment on the back rather than visible holes on the front. This design creates space between the button and fabric, making it suitable for thicker garments such as coats and structured jackets. Metal buttons, decorative buttons, and covered buttons may also use shank-style attachments.
Jeans buttons often have a different construction because many are secured using metal tack fasteners rather than ordinary sewing thread. These attachments are designed to withstand pressure around waistbands and other reinforced clothing areas. Identifying the original button type before starting helps you choose an appropriate repair method and avoid damaging the garment.
How to Prepare Your Garment Before Sewing a Button
Proper preparation makes button replacement easier and helps the finished repair look neat. Begin by placing the garment on a clean, flat surface with the damaged area facing upward. Examine the original button position, surrounding fabric, and remaining stitching to determine whether the material needs additional attention.
Remove loose or broken threads carefully without cutting into the garment itself. If the original button left visible stitch holes, use them as a guide for positioning the replacement. Otherwise, close the garment and align the buttonhole with the opposite fabric layer to identify where the new button should sit.
Mark the correct position lightly with tailor’s chalk or another suitable removable fabric marker. Make sure the fabric lies naturally without stretching or twisting, especially around fitted clothing and waistbands. Taking a moment to check the position can prevent uneven closures, uncomfortable pulling, and the need to repeat the repair.
How to Thread a Needle and Secure the Thread
Threading a needle is one of the first steps in learning how to replace a button by hand. Cut a manageable length of thread, usually around 18 inches, and pass one end through the needle’s eye. If the thread becomes difficult to insert, trim the end cleanly or use a needle threader.
For many everyday buttons, doubling the thread provides additional strength and reduces the number of passes required. Pull the ends together and tie a small knot to secure them before beginning. A single strand may be more appropriate for delicate fabrics or situations where heavier stitching could create visible marks.
Start sewing from the wrong side of the garment so the opening knot remains hidden. Pass the needle through the fabric at the marked button position, taking care not to pull the thread too tightly. Secure starting stitches help create a stable foundation and reduce the likelihood of the button loosening during regular use.
How to Replace a Two-Hole Button Step by Step
Replacing a two-hole button is one of the easiest hand sewing projects for beginners. Position the button over the original stitching marks or the location you identified earlier. Bring the threaded needle through the fabric and one buttonhole, then pass it downward through the second hole and back into the garment.
Repeat this movement several times until the button feels securely attached. Keep the stitches consistent and avoid pulling the button tightly against thick fabric that needs additional fastening space. For lightweight shirts, a small amount of clearance is usually enough to allow the buttonhole fabric to sit comfortably beneath the button.
Finish by bringing the needle to the wrong side of the garment and securing the thread with small stitches or a knot. Trim the excess thread carefully without cutting the newly sewn stitches. Fasten and unfasten the button several times to confirm that it moves naturally and stays securely attached.
How to Sew a Four-Hole Button Correctly
Four-hole buttons are commonly found on shirts, cardigans, jackets, and other everyday garments. Their additional holes allow the thread to form different stitching patterns while securing the button to the fabric. Before sewing, examine the remaining buttons to determine which pattern matches the garment’s original appearance.
One common method involves creating two parallel lines of stitches through opposite pairs of holes. Another option is a crossed pattern that forms an X across the button’s surface. Both methods can provide secure attachment when completed correctly, so choose the pattern that best matches the surrounding buttons.
Pass the needle through each selected pair several times while maintaining consistent thread tension. If the fabric is thick, leave enough clearance for the buttonhole layer to fit beneath the button comfortably. Secure the thread on the garment’s inner side, then inspect the finished stitching for even spacing and a tidy appearance.
How to Replace a Shank Button on a Coat or Jacket
Shank buttons differ from flat buttons because the attachment loop sits underneath the decorative front. This raised structure provides room for thick fabric layers and allows the fastening to sit comfortably when the garment is closed. Shank buttons are particularly common on winter coats, blazers, formal jackets, and other structured clothing.
Start by marking the correct position and threading a suitable needle with strong matching thread. Pass the needle through the garment fabric and the loop on the back of the button. Repeat the process several times, keeping the stitches close together and making sure the button remains properly positioned.
When the attachment feels secure, bring the needle to the inside of the garment and finish with small securing stitches. Avoid pulling the button so tightly that the fabric puckers or the shank becomes difficult to move. A properly attached shank button should support the coat’s fastening without creating unnecessary strain.
How to Replace a Button on Jeans or Trousers
Buttons on jeans and trousers often experience more pressure than those on lightweight shirts. Waistbands are pulled during dressing, sitting, and everyday movement, making secure fastenings particularly important. Before starting a repair, determine whether the garment uses a traditional sewn button or a metal tack-style fastening.
If the trousers use a sewn button, select a durable replacement that fits the existing buttonhole. Use suitable thread and reinforce the attachment with multiple passes through the buttonholes or shank. Check the surrounding fabric for weak stitching or damage because a secure button cannot compensate for an unstable waistband.
Metal jeans buttons require a different approach because they are commonly attached using specialized tack components. Follow the replacement manufacturer’s instructions and use components designed for the garment’s fabric thickness. If the original attachment has left a large hole or weakened the waistband, a professional clothing repair may provide a more dependable result.
How to Create a Thread Shank for Thick Fabrics
A thread shank is a small wrapped section of thread that creates space between a flat button and the garment fabric. This technique is especially helpful for coats, jackets, and other clothing with thick buttonhole layers. Without enough clearance, fastening the garment may pull tightly against the button and place unnecessary stress on the stitching.
To create a thread shank, sew the button in place while leaving a small amount of space beneath it. You can use a removable spacer, such as a suitable blunt tool, to maintain even clearance during stitching. After securing the button through its holes, carefully remove the spacer without disturbing the thread.
Bring the needle beneath the button and wrap the working thread around the supporting stitches several times. These wraps create a firm thread column that supports the button at the required height. Finish by securing the thread neatly on the wrong side of the garment and checking that the fastening works comfortably.
How to Replace a Button Without Matching Thread
Matching thread creates a discreet repair, but an exact color match is not always available. In many situations, a close neutral shade can provide an acceptable alternative without drawing attention to the stitching. Consider the button color, garment fabric, and visibility of the thread before selecting a substitute.
For dark garments, black, charcoal, or another similarly dark shade may blend naturally with the button. Light clothing can sometimes be repaired using white, cream, or pale gray thread, depending on the original design. Decorative buttons also provide opportunities to use contrasting thread intentionally when it complements the garment’s overall appearance.
Avoid selecting thread based only on color because strength and thickness are equally important. Heavy thread may look awkward on delicate clothing, while thin thread may not provide enough support for a thick coat button. Choosing an appropriate thread weight helps create a repair that looks balanced and remains secure.
Common Button Sewing Mistakes and How to Avoid Them
One frequent mistake is sewing a button too tightly against the garment. This may make the fastening difficult to close and create pulling around the buttonhole during wear. Leave suitable clearance based on the fabric thickness, particularly when working with coats, blazers, or other structured clothing.
Another mistake is using too few stitches or failing to secure the thread properly. A button may appear attached initially but loosen after repeated fastening, washing, or daily movement. Reinforce the attachment with several consistent passes and finish the thread securely without creating an unnecessarily bulky knot.
Incorrect button placement can also affect how a garment fits and looks. A button positioned too far from its original location may cause uneven closures, wrinkles, or uncomfortable tension. Always check alignment with the corresponding buttonhole before sewing and test the fastening when the repair is complete.
How to Make Your Button Repair Look Professional
A professional-looking button repair begins with accurate placement and careful material selection. Choose a replacement that complements the garment and follow the original stitching pattern whenever possible. Keeping the button aligned with nearby fastenings helps maintain a consistent appearance, particularly on shirts and formal clothing.
Pay attention to thread tension and the way the button sits against the fabric. Uneven stitches, bulky knots, and loose thread ends can make a simple repair appear unfinished. Work slowly, maintain consistent spacing, and secure the thread on the garment’s inner side to keep the visible surface neat.
After sewing, inspect the button under good lighting and test how it functions when the garment is closed. Smooth the fabric around the fastening and check for puckering or unusual pulling. If the garment’s care label permits pressing, gently smooth the surrounding material to complete the repair.
Easy Clothing Style Ideas Using Replacement Buttons
Replacing buttons can be a simple way to refresh clothing that already fits comfortably and remains in good condition. A plain cardigan, for example, can take on a different appearance with coordinated decorative buttons. Choose replacements that complement the fabric and fit the original buttonholes to maintain both functionality and style.
A classic button-down shirt can also benefit from a complete set of new buttons. Neutral replacements create a subtle, versatile appearance, while carefully chosen contrasting buttons introduce a distinctive detail. Pair the refreshed shirt with tailored trousers, jeans, or a casual jacket to create outfits suitable for different everyday occasions.
Jackets and coats offer additional opportunities for thoughtful button updates. Replacing worn fastenings with suitable metal, wooden, or covered buttons can create a cleaner finish without changing the garment’s overall construction. When customizing clothing, prioritize secure attachments and practical button sizes so the finished piece remains comfortable to wear.
How to Prevent Buttons from Falling Off Again
Regular clothing maintenance can help prevent small fastening problems from becoming larger repairs. Check frequently worn shirts, trousers, and jackets for loose buttons or weakened stitching. If a button begins moving excessively or the supporting thread looks damaged, reinforce it before the attachment fails completely.
Follow garment care labels when washing and drying clothing with buttons. Delicate items may benefit from gentle washing methods, while heavily decorated garments sometimes require additional protection during laundry. Avoid forcing tight buttonholes or pulling directly on buttons when opening clothing because repeated stress can weaken the attachment.
Keep spare buttons and small sewing supplies in an accessible location for quick repairs. When purchasing new clothes, check whether replacement buttons are included and store them where they can be found later. These simple habits make wardrobe maintenance easier and help extend the useful life of garments you regularly wear.
Conclusion
Learning how to replace a button is a valuable beginner sewing skill that can solve many everyday clothing problems. Whether you are repairing a shirt, attaching a coat button, or restoring a trouser fastening, the process becomes easier with suitable tools and careful preparation. Accurate placement, secure stitching, and appropriate thread tension are essential for a dependable result.
Different button designs require slightly different techniques, so identify the original fastening before beginning. Two-hole buttons, four-hole buttons, and shank buttons can often be attached with basic hand sewing methods, while metal jeans buttons may require specialized components. Understanding these differences helps you choose the right method without damaging your clothing.
With regular practice, replacing buttons can become a quick and manageable part of your clothing care routine. It also provides opportunities to personalize older garments and maintain a practical, versatile wardrobe. A small, carefully completed repair can keep a favorite piece of clothing looking neat, functioning properly, and ready for everyday wear.
Frequently Asked Questions
What is the easiest way to replace a button by hand?
Thread a needle, position the replacement button over the original stitching marks, and sew through its holes several times. Secure the thread on the inside and test the fastening before wearing the garment.
Can I replace a button without a sewing machine?
Yes, most standard clothing buttons can be replaced using a hand-sewing needle and thread. Flat buttons and shank buttons are particularly suitable for hand sewing, making a sewing machine unnecessary for many repairs.
How many stitches should I use when sewing a button?
The number depends on the fabric, thread strength, and button design. Make several secure passes through the holes or shank, then finish with small locking stitches to prevent the thread from loosening.
How do I replace a button when the original is missing?
Check the garment for spare buttons or find a replacement with a similar size, thickness, and style. Align it with the existing buttonhole and mark the correct position before attaching it securely.
Why does my button keep falling off after sewing?
Repeated button loss may result from weak thread, insufficient securing stitches, excessive tension, or damaged fabric. Check the button’s placement and attachment method, then reinforce the surrounding material if necessary.